So you want to try out StellarX? There are plenty of good reasons for wanting to.
StellarX bills itself as the world’s first fee-less, decentralized marketplace. It allows total access to the Stellar ecosystem. As more and more ICOs choose Stellar as their platform for fundraising, there will be more and more opportunities within the Stellar community.
Until now, decentralized exchanges have put a lot of people off because of being somewhat complicated and difficult to use (for the not-so tech-savvy, at least).
Thankfully, StellarX places a lot of emphasis on ease of use, and the interface is fairly intuitive.
For those who have never used a decentralized exchange before, or those who are new to cryptocurrency in general, it can still be kind of intimidating—so this guide is here to help explain the basics of how to use StellarX.
What You Should Know Before Signing Up
It’s important to remember when you sign up for a decentralized exchange that you will be responsible for your own funds. This means if you get hacked or lock yourself out of your account, you can’t run crying to the government or some corporation and expect them to help you.
As some in the cryptocurrency community like to point out: if you own cryptocurrency on a centralized exchange, you don’t own cryptocurrency. The custodial service, like Coinbase, Binance, or whatever, does. So signing up for a DEX is a big step into taking your financial life into your own hands.
While full-blown hacks are relatively rare, it is still good to take some basic precautions. For example:
- First and foremost, don’t advertise the fact that you own cryptocurrency in public, especially if you have a large amount. If you do talk about the fact that you own cryptocurrency, consider using a VPN and not sharing information that can be linked to your identity or location.
- Take care clicking links or downloads where you are not certain of the integrity of the source.
- Always make sure that the URL address of the website is written EXACTLY as it should be.
- Enable 2FA (2-factor authentication, discussed later on in the guide)
- Consider investing in a hardware wallet like the Nano Ledger to manage your private keys.
- If you use Windows, consider not using Windows. Most viruses are designed for Windows, and security is generally better with Linux or Mac OS. I use Ubuntu, a free user-friendly Linux operating system, and while it takes a bit more effort, it is rewarding in so many ways. If you have some free time, you can take a few hours to install an encrypted partition with Ubuntu.
An encrypted partition means you clean out an area of your computer’s memory, and install another operating system on it that runs in parallel to your main operating system. Encrypting adds another layer of security, and you can be careful on this partition not to do stuff like downloading torrents or files that may be compromised, and limit your internet activity to trusted sources.
Personally, my security philosophy is “Don’t be a target.” If you are using your account for trading, don’t keep any more funds in your trading wallet than you need to. Of course, everyone has their own approach.
That being said, the odds of a small potatoes crypto owner getting targeted for a hack are pretty slim. This is another big advantage of decentralized exchanges—it’s very worthwhile for a skilled hacker or group of hackers to target a centralized exchange with a huge amount of funds. It takes a lot of time and work to pull off a hack (it’s not nearly as glamorous as in the movies) and it’s not really worth it to steal a couple thousand bucks from your average retail trader.
If you are the paranoid type, there are plenty of comprehensive guides on security online.
How to Open an Account on StellarX
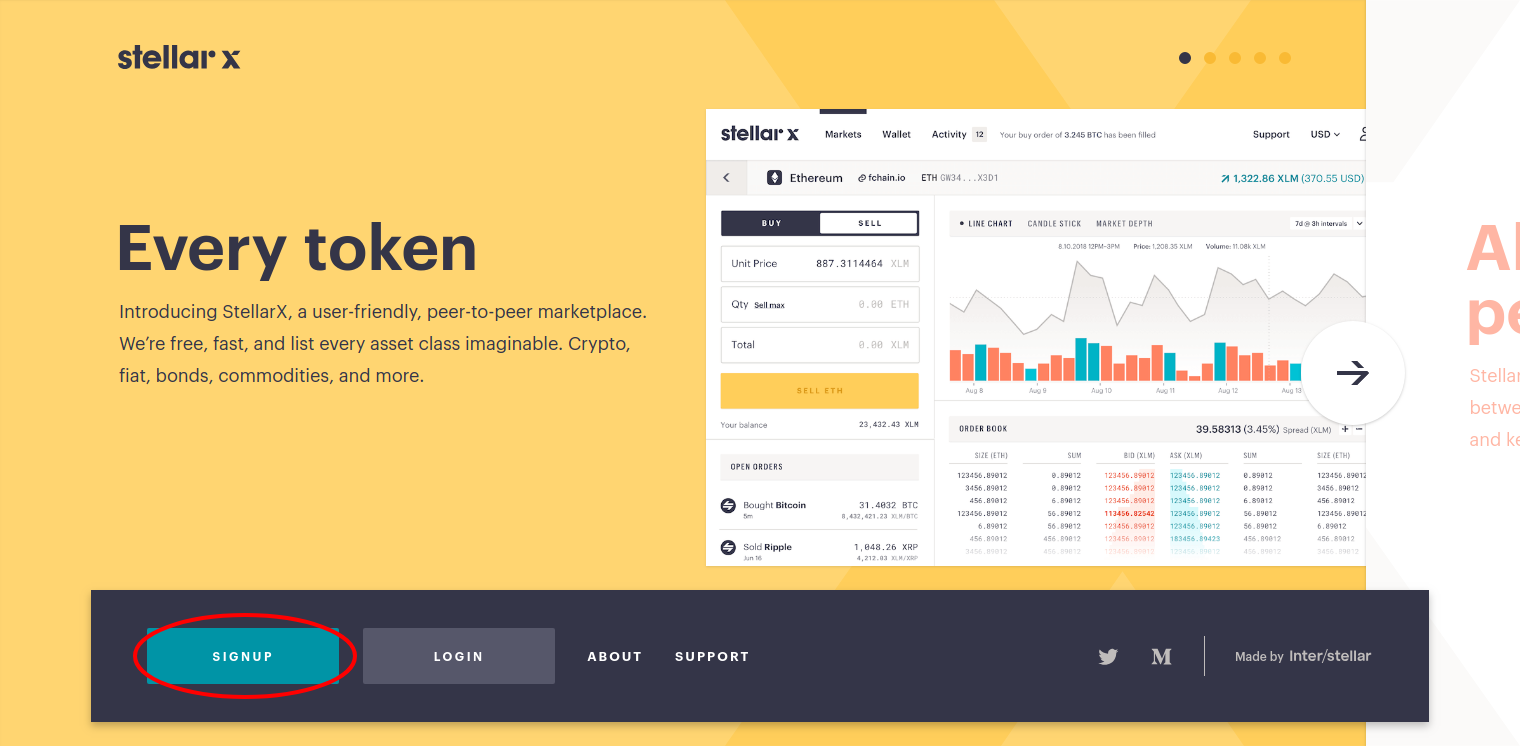
Step 1: Go to the StellarX Site
The first thing you need to do is navigate to the StellarX main page. Once you are there, you will see 2 main options.
If you have not signed up already, you will want to click the teal “Sign Up” button.
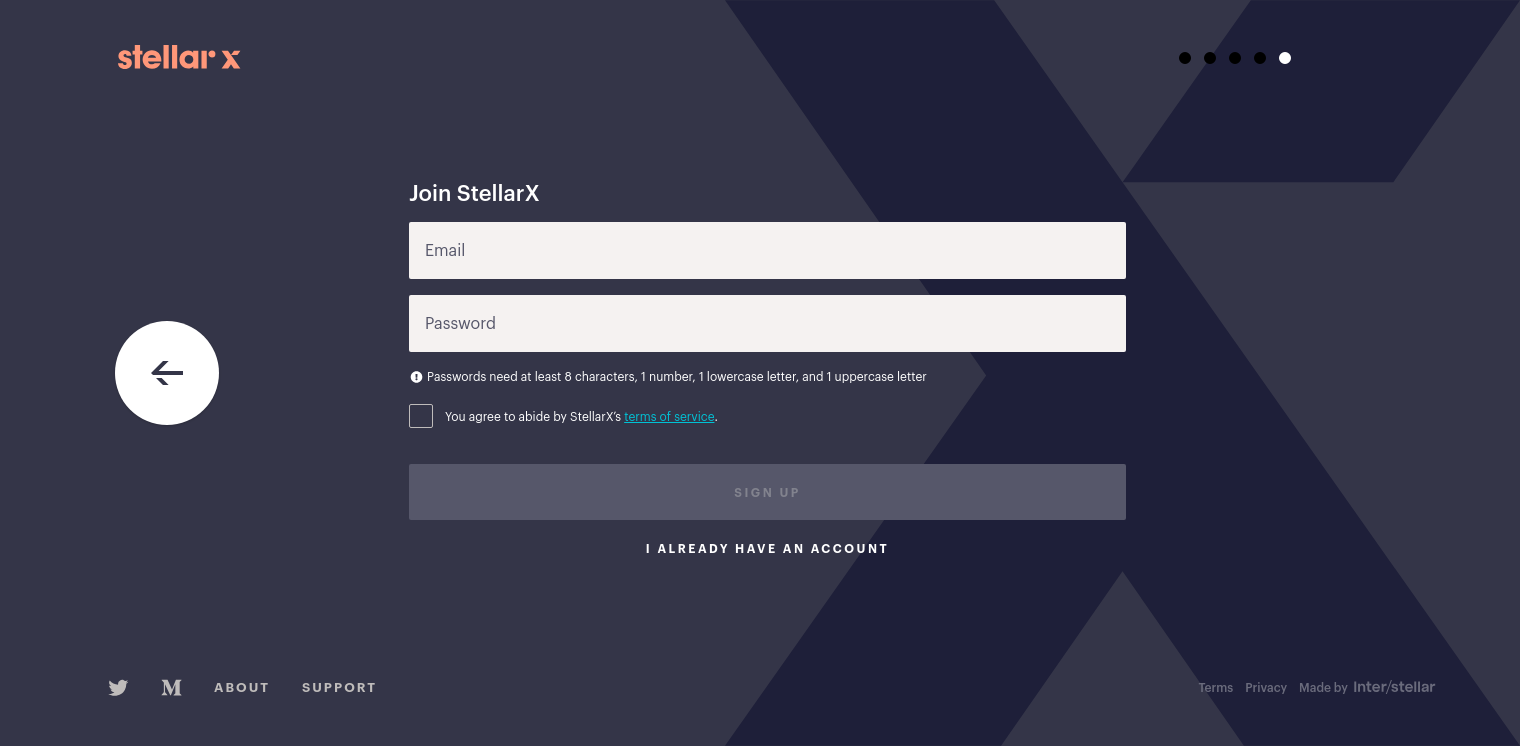
Step 2: Register
This will take you to a simple registration form that will ask you to enter your email address and a password. After this, you will receive an email. Click the link to confirm your email.
Step 3: Generate a New Key
You will now be able to login. The first thing you will see is a prompt asking if you want to generate a new Stellar key, use an existing key, or use a hardware wallet like Ledger.
Most users will probably be generating a new key. This will be stored on your hard drive. After selecting this option, you will be shown a seed phrase.
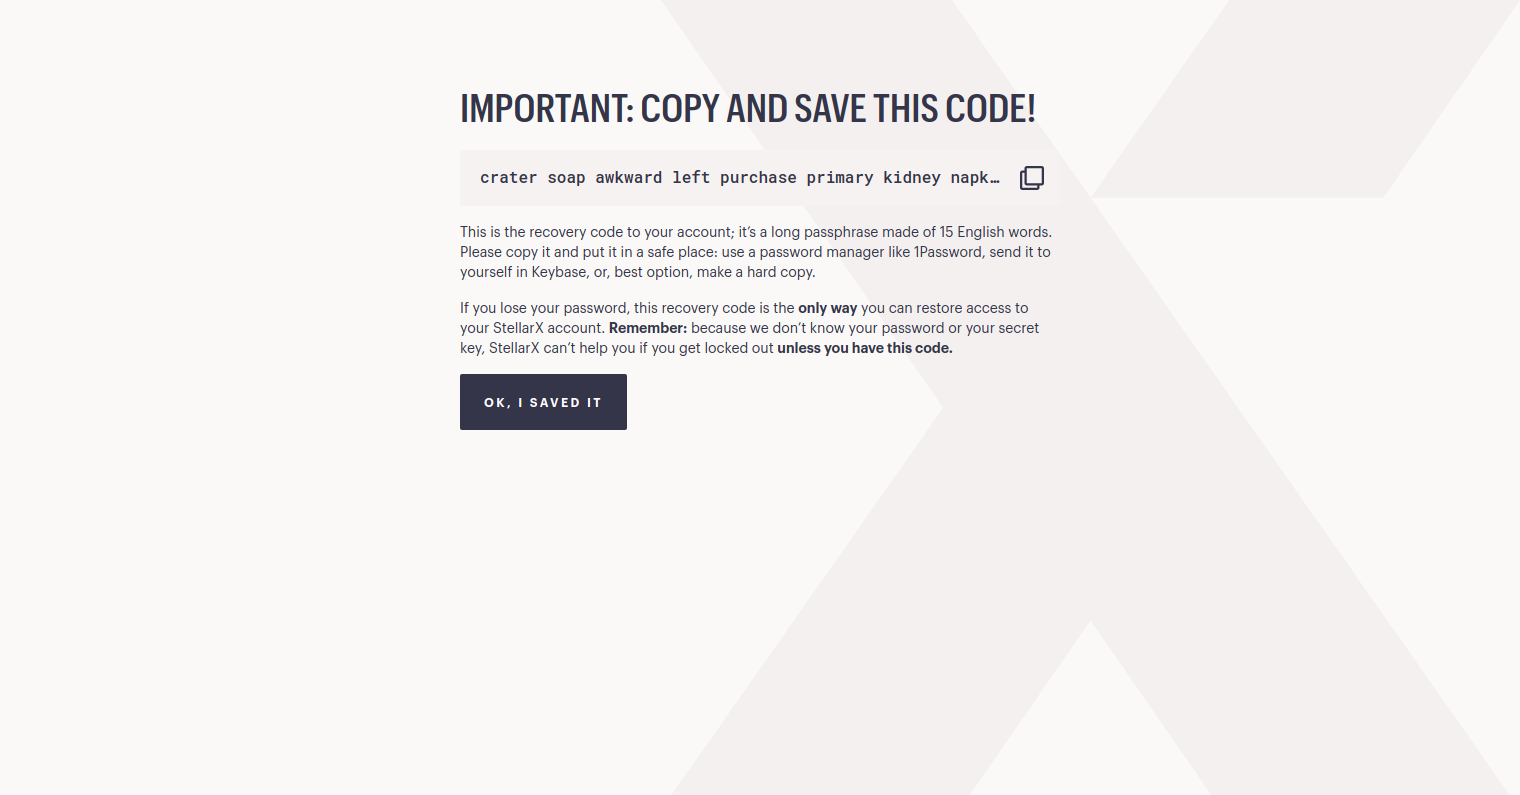
This phrase is the ONLY way you will be able to recover your account if you lose or forget your password, so it is best to save it in an encrypted password manager, or (better) write it down on a piece of paper and keep it in a safe place.
After this you will be taken straight to the main page. Here, you will be asked if you want to take a little tour of the site where you will be shown why StellarX is awesome and different than other exchanges.
If, for some reason, you missed out on your seed phrase, you can always click on the user icon at the top of the screen and then go to Settings.
Then scroll to the bottom of the Settings screen and click on “Renew Recovery Code.”
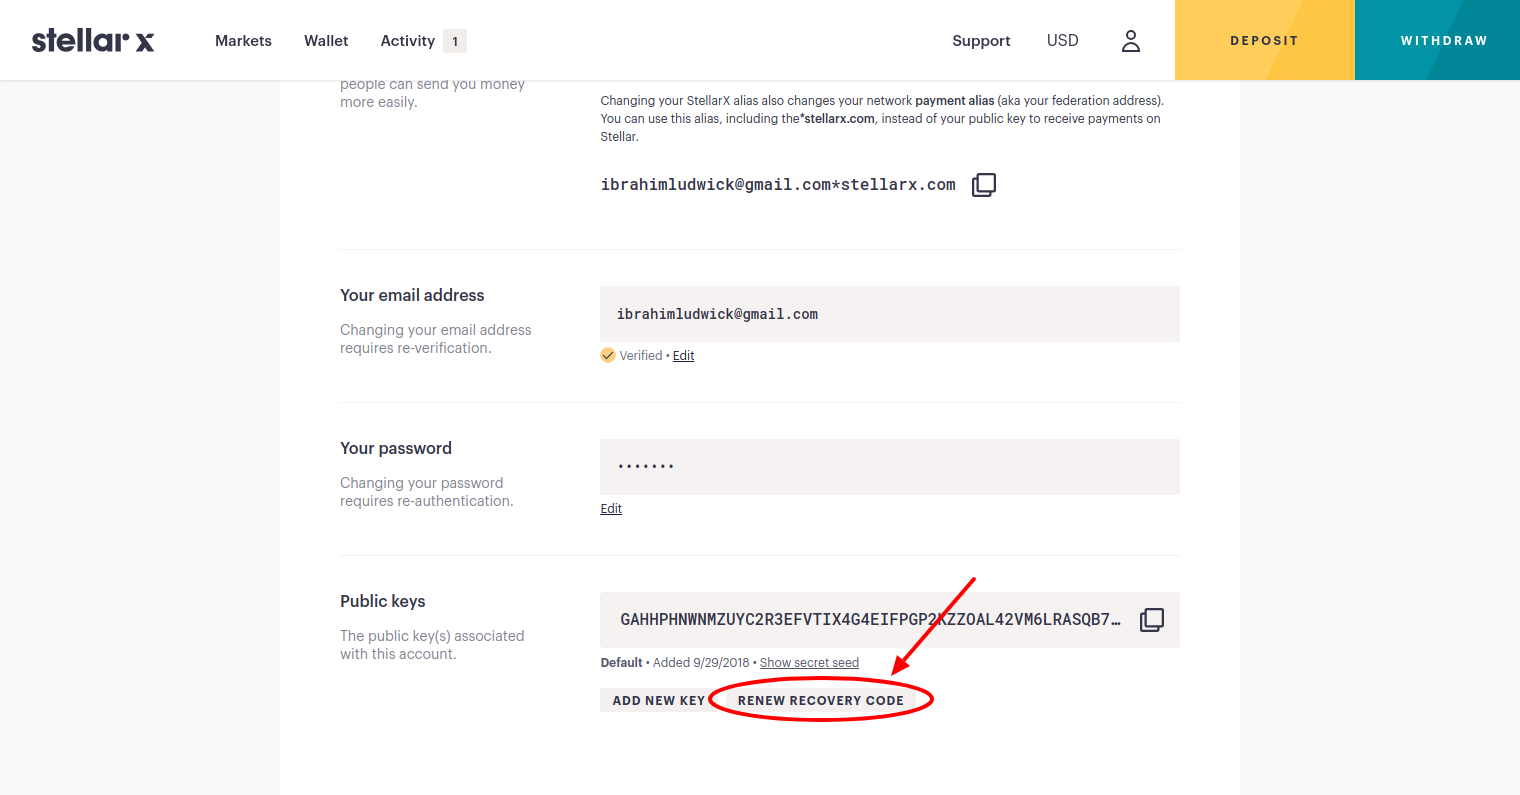
This can be useful if you lose your seed phrase for some reason, or if you somehow miss out on it in the process of verifying your email.
Step 4: Set Up Security Settings
StellarX does not come with 2-factor authentication on by default, so if you want to turn it on, go to Settings as described above, but click the Security tab.
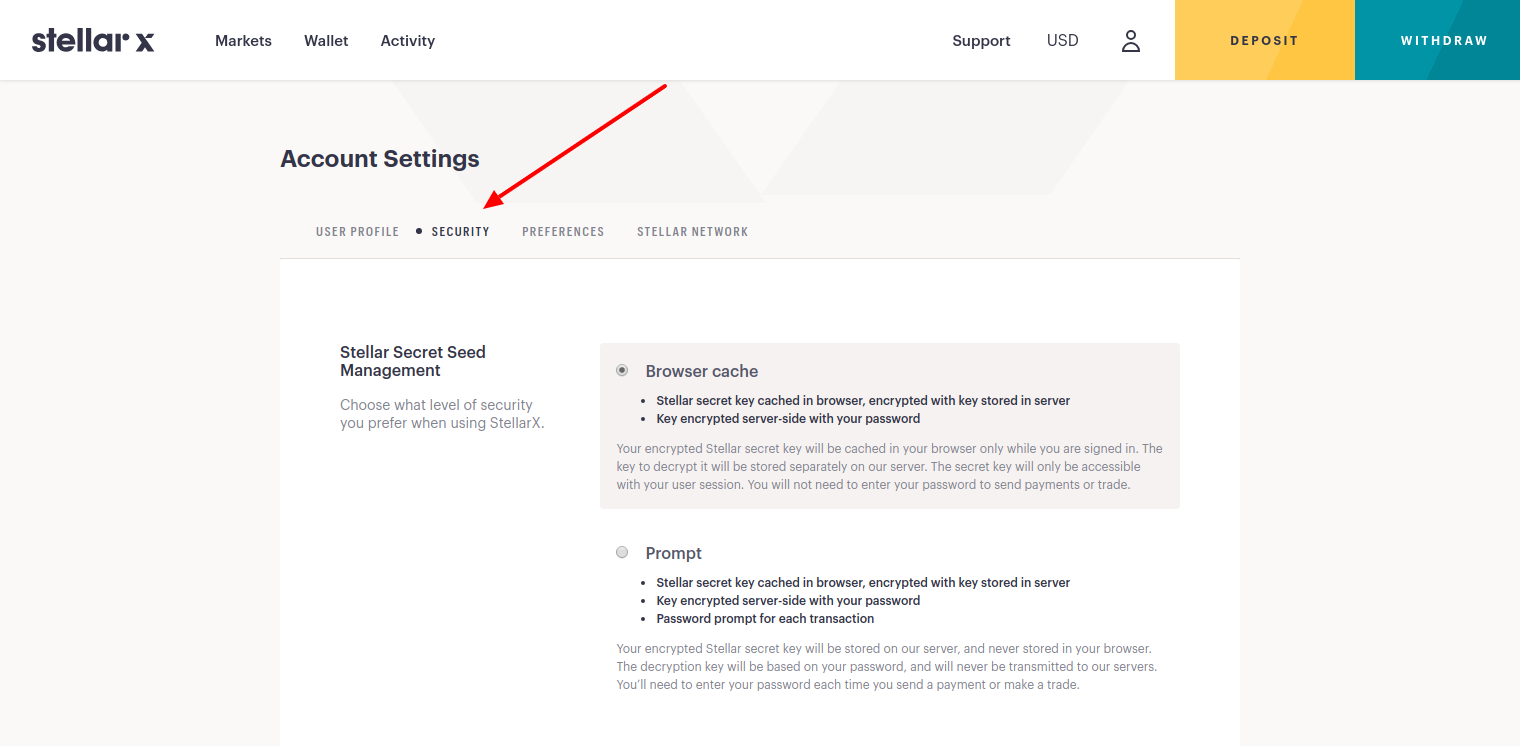
In this tab, you can customize your security settings. The default is that you will be asked for your password to login, but can trade freely once you are in.
You can upgrade this, however, so that you will be asked for your password every time you move funds. You can also upgrade to use a hardware wallet on this page at any time.
To enable 2FA, scroll to the bottom of the page and click “Require multi-factor authentication.”
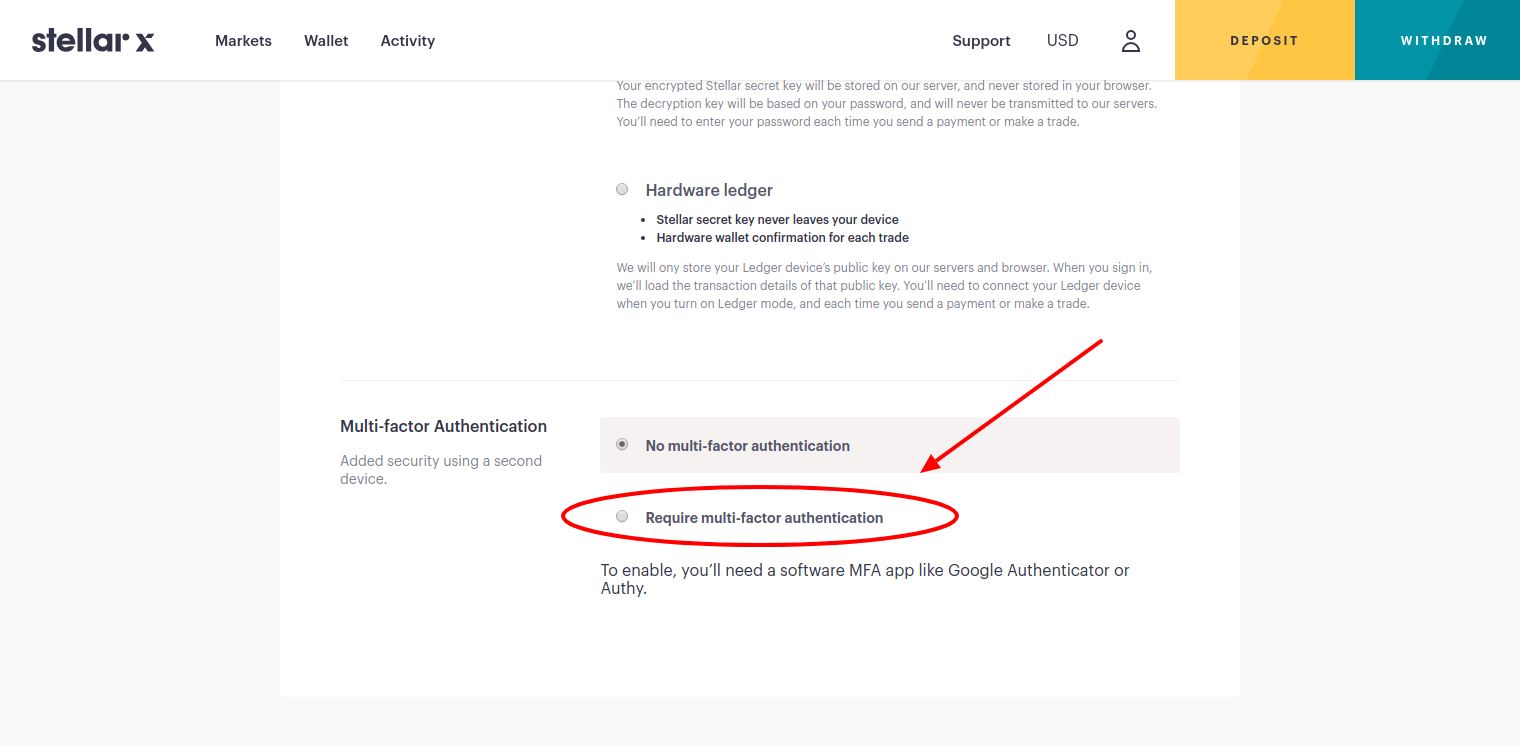
If you don’t have an Authentication app installed, you will need to download one now. Google Authenticator has become pretty standard but there are others you can read about here.
Using your phone, scan the QR code displayed, and enter the code displayed under StellarX in the Authentication app.
Step 5: Deposit Funds into Your Account
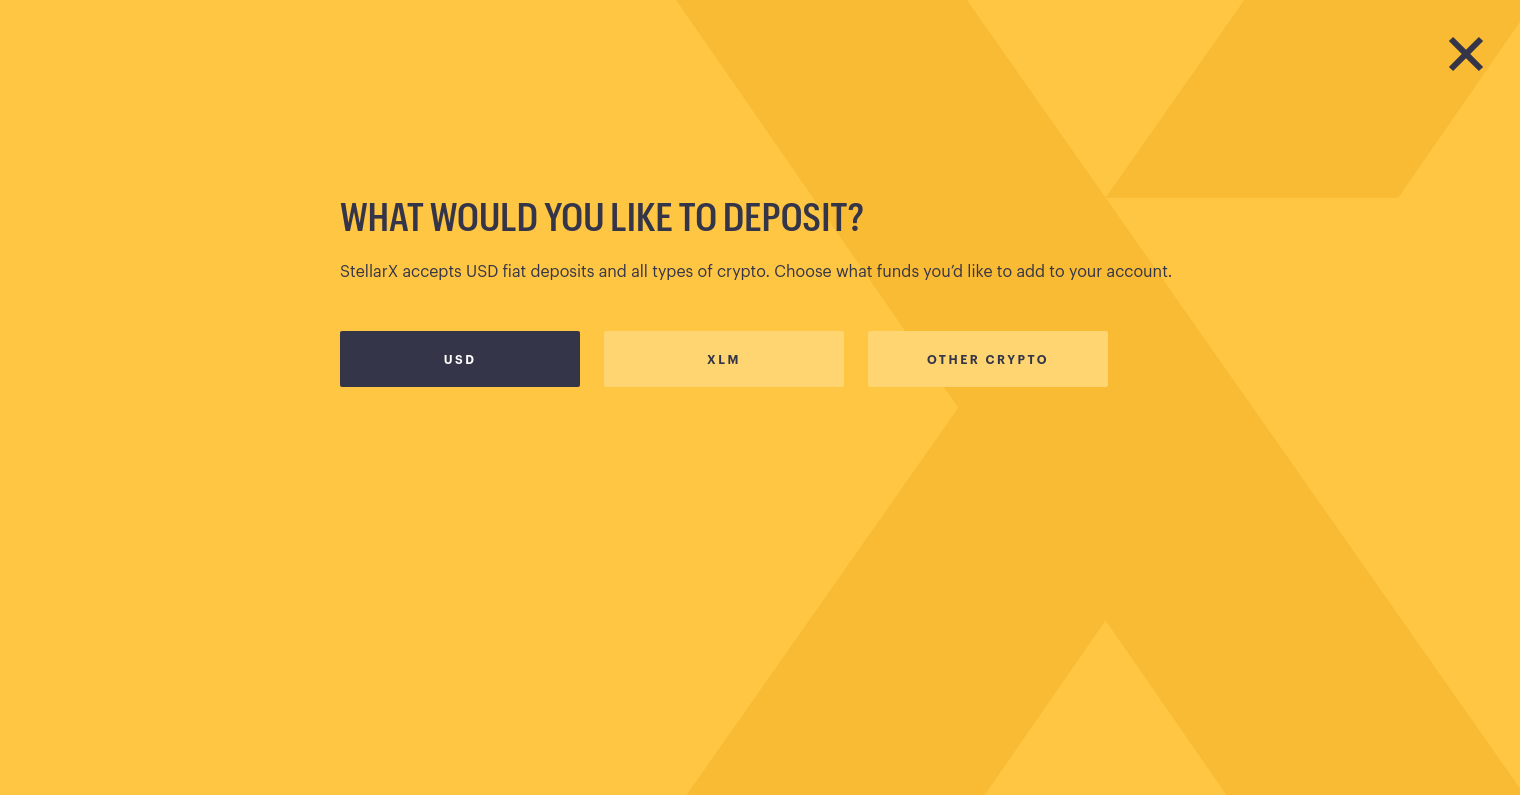
Now that you have security set up to your satisfaction, you can deposit funds with peace of mind. Just click the Deposit button on the top right of the screen.
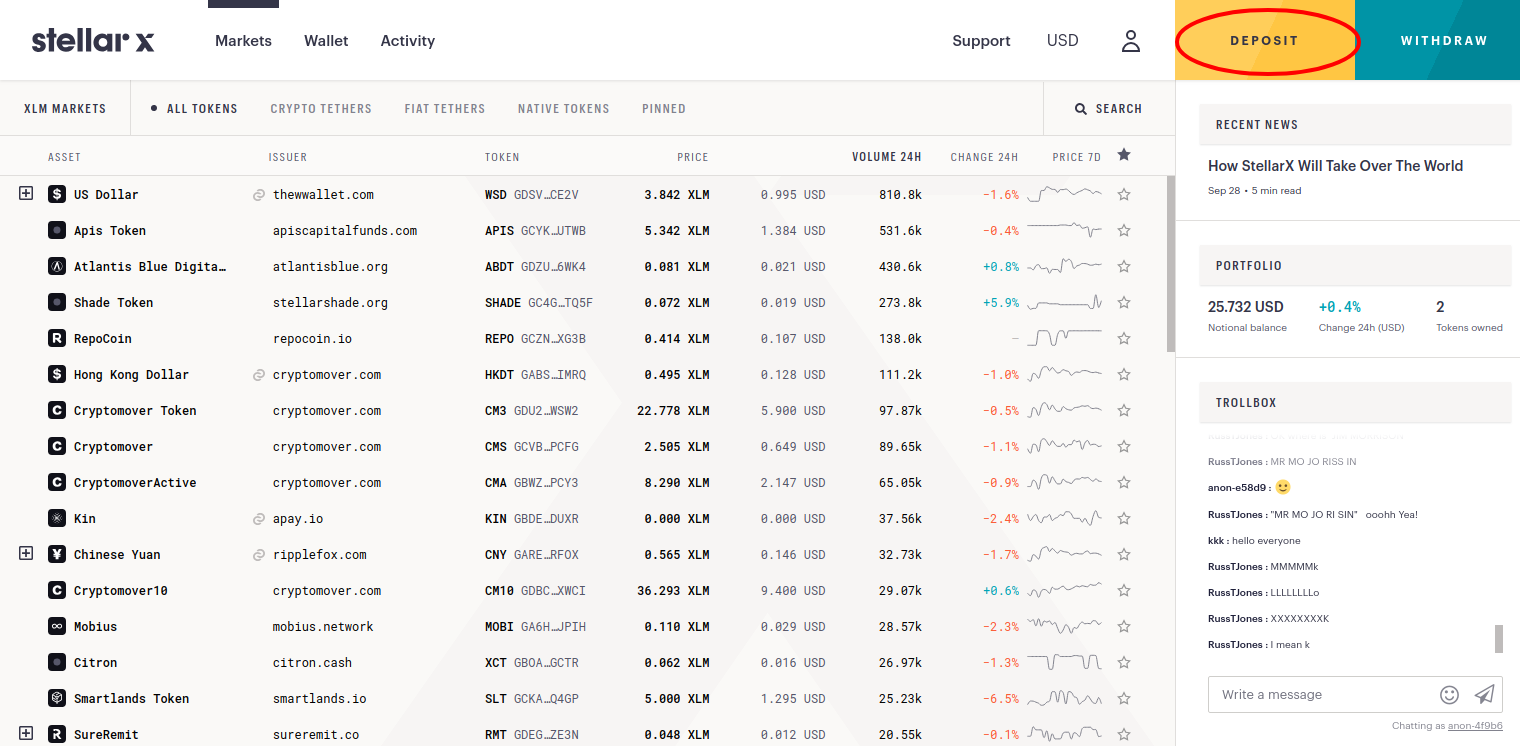
There are 3 options here: deposit cryptocurrency (easy), deposit Stellar Lumens (XLM) (easiest), or deposit USD (slightly more difficult).
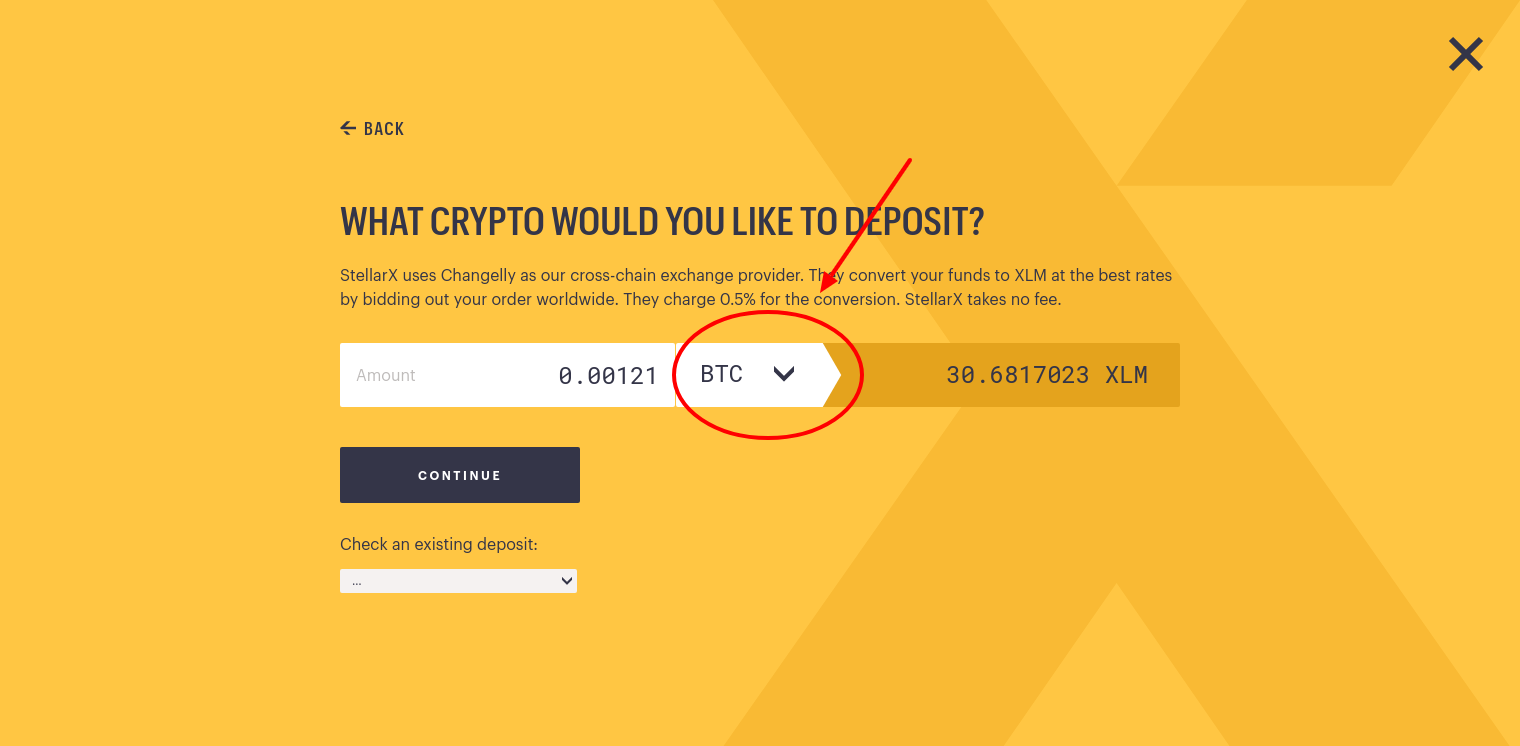
If you deposit cryptocurrency like Bitcoin or Ethereum, you should know that StellarX partners with Changelly, and your funds will actually be exchanged for XLM at the best available market rate when you send them.
If you want to deposit USD, you will need to go through an annoying identity check. StellarX’s partners support ACH direct debit, however, so if you do link your bank account up it could be a very convenient gateway to cryptocurrency.
If for whatever reason you are not comfortable with this, you can check LocalBitcoins.
The procedure for depositing XLM or cryptocurrency is straightforward. Simply select which currency you will be using, and copy and paste (or manually input) the deposit address into whatever app or wallet you are sending from.
Note: Sending XLM sometimes requires a memo, but for deposits to StellarX, no memo is required.
How to Use StellarX
Buying and Selling on StellarX
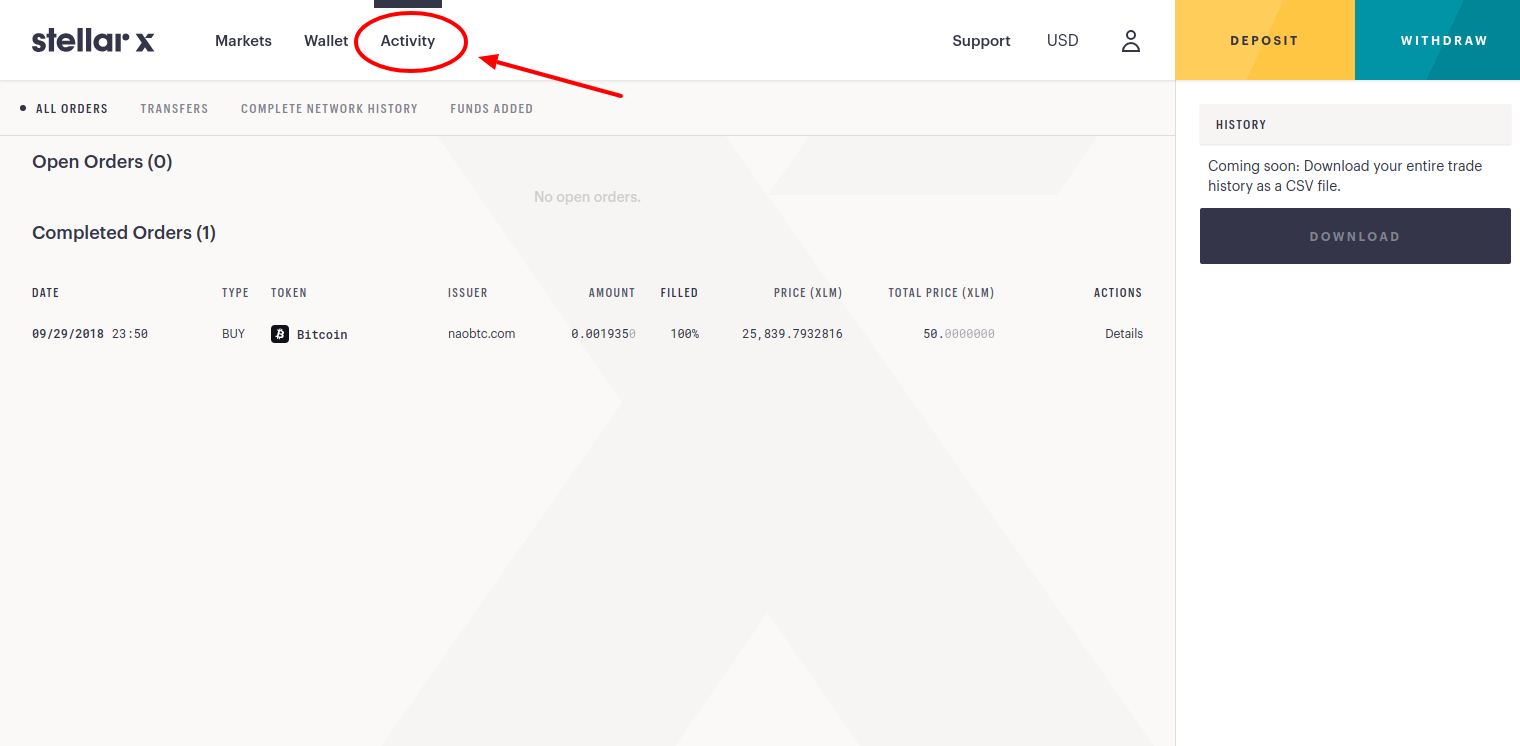
You can check the status of your deposit by clicking the Activity tab at the top of the screen and then clicking the Transfers tab. When the funds arrive, you will see a completed transfer here.
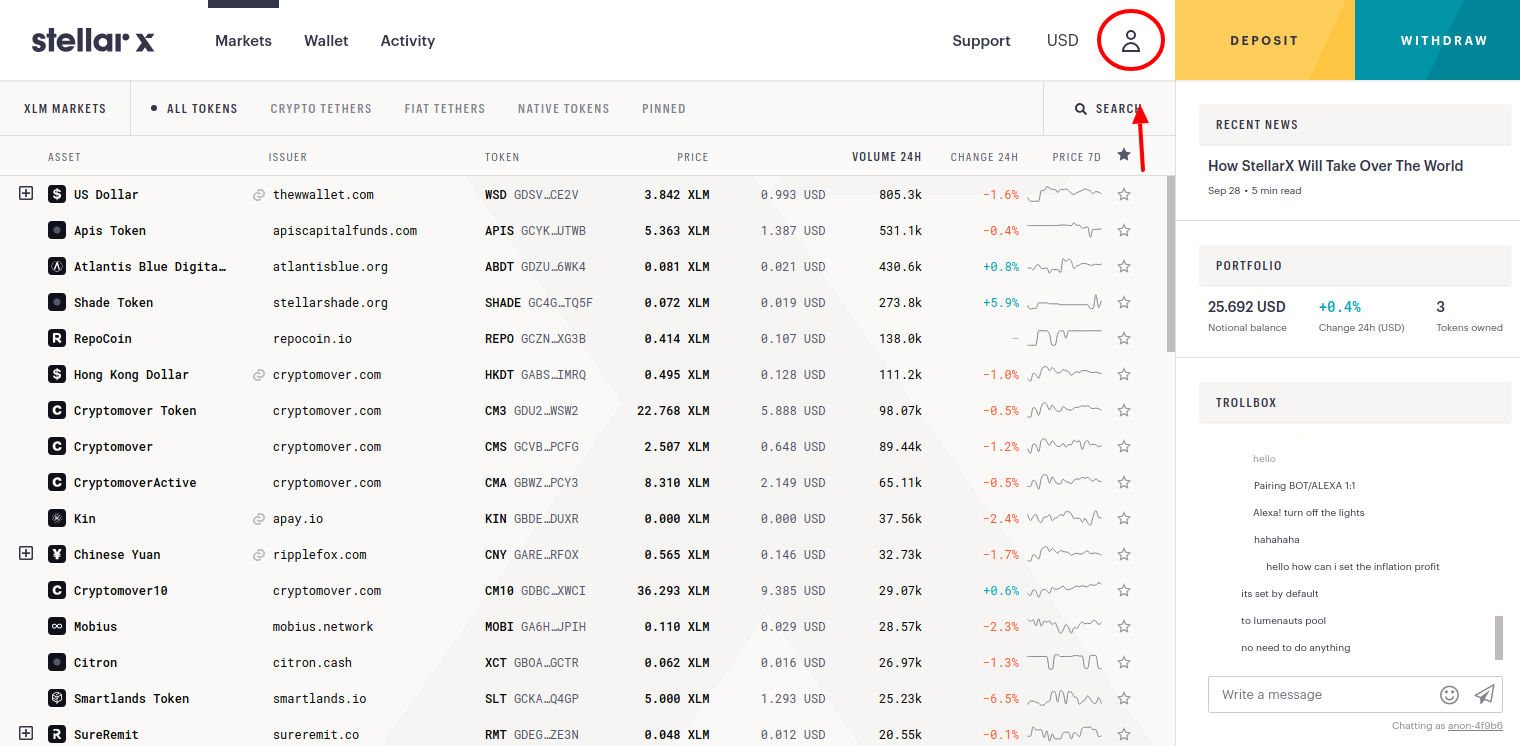
Now you can navigate to the “Market” tab.
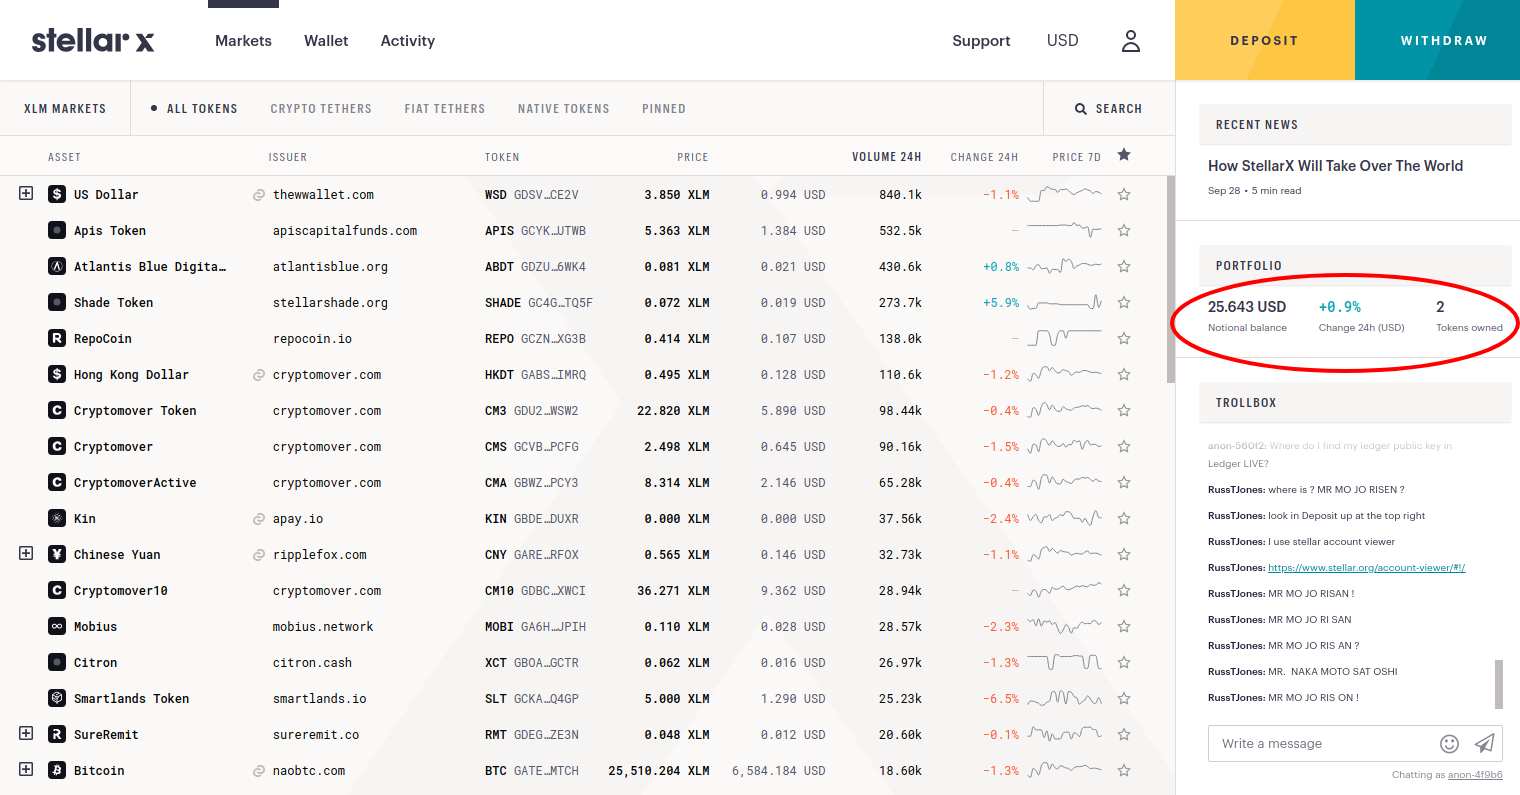
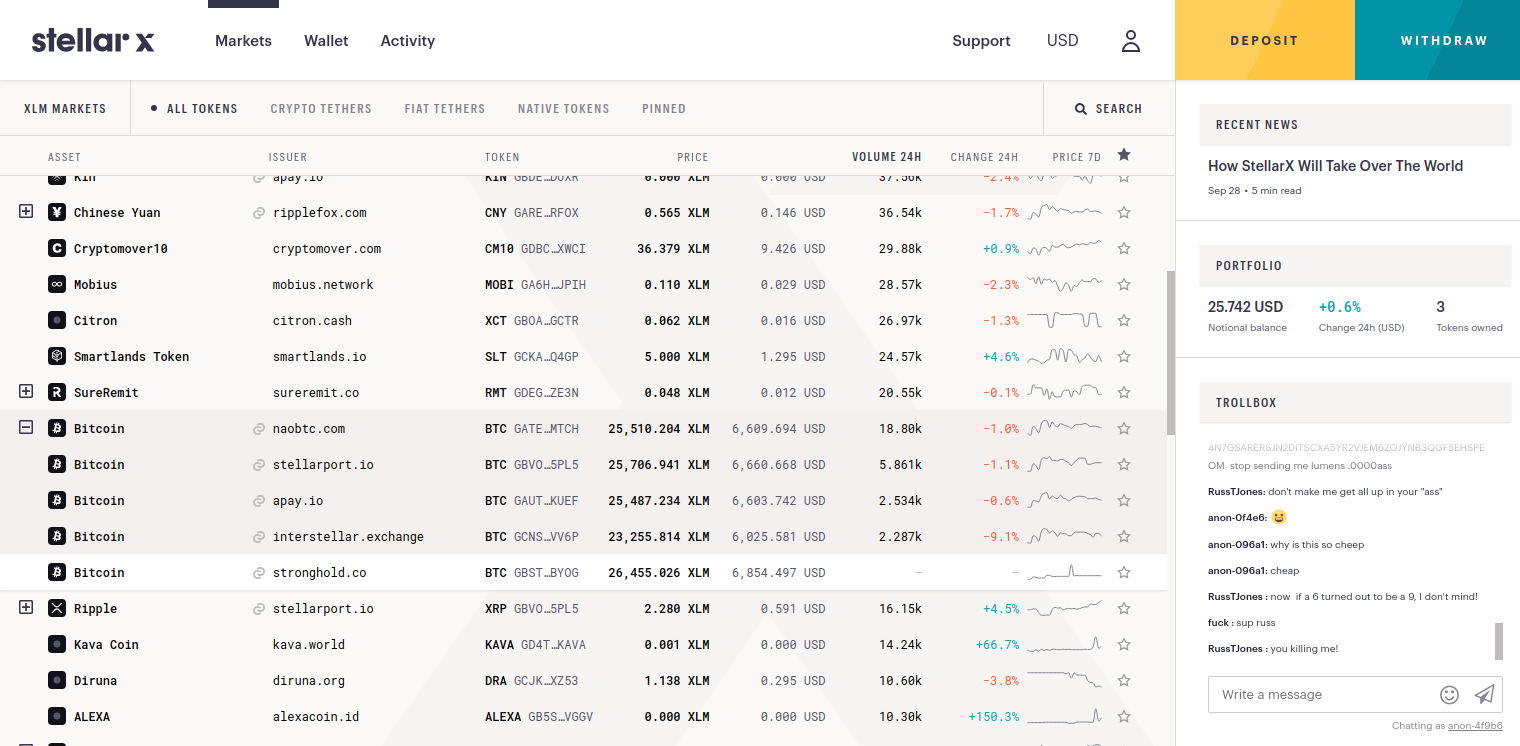
The main screen displays all of the tokens available. You can also view the approximate value of your holdings along with the number of tokens you own and your portfolio’s 24h performance. As you can see, I have $25. That’s because I’m rich. Beneath this is the trollbox, where you can chat with other traders.
Important to know is that many of the assets on the exchange are “tethered.” This means that you are actually buying IOUs or promissory notes by issuers that hold the actual asset. This is why the symbols are different, i.e., US dollars are not represented by USD and British Pounds are not GBP.

Before you buy tethered assets, you may want to check the URL of the issuer of the asset and make sure you are comfortable with trusting them. All URLs are listed next to the asset.
If you are trading XLM or Stellar-based tokens, however, then you actually have ownership of everything, so no worries. You can view all Stellar-based tokens by clicking the “Native Tokens” tab.
There are hundreds of tokens available with new ones appearing all the time, so you can find your favorites more easily by clicking the star icon to add them to the Pinned tab.
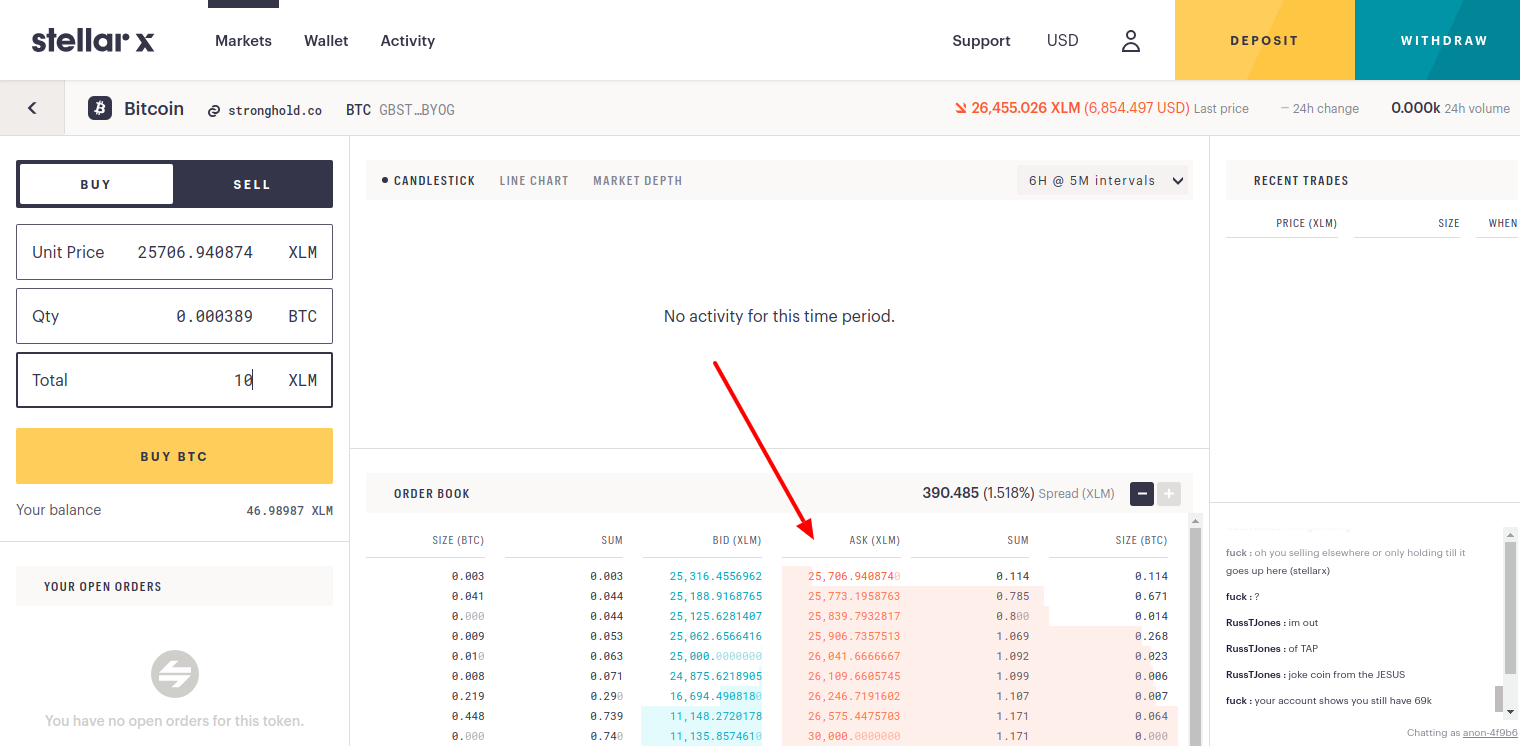
If you are interested in buying a token, simply click on the token you want. I selected Bitcoin here.
This opens the page with charts that show recent prices, as well as the ask/bid table and buying and selling tools. The functionality here is not so different than any centralized exchange.
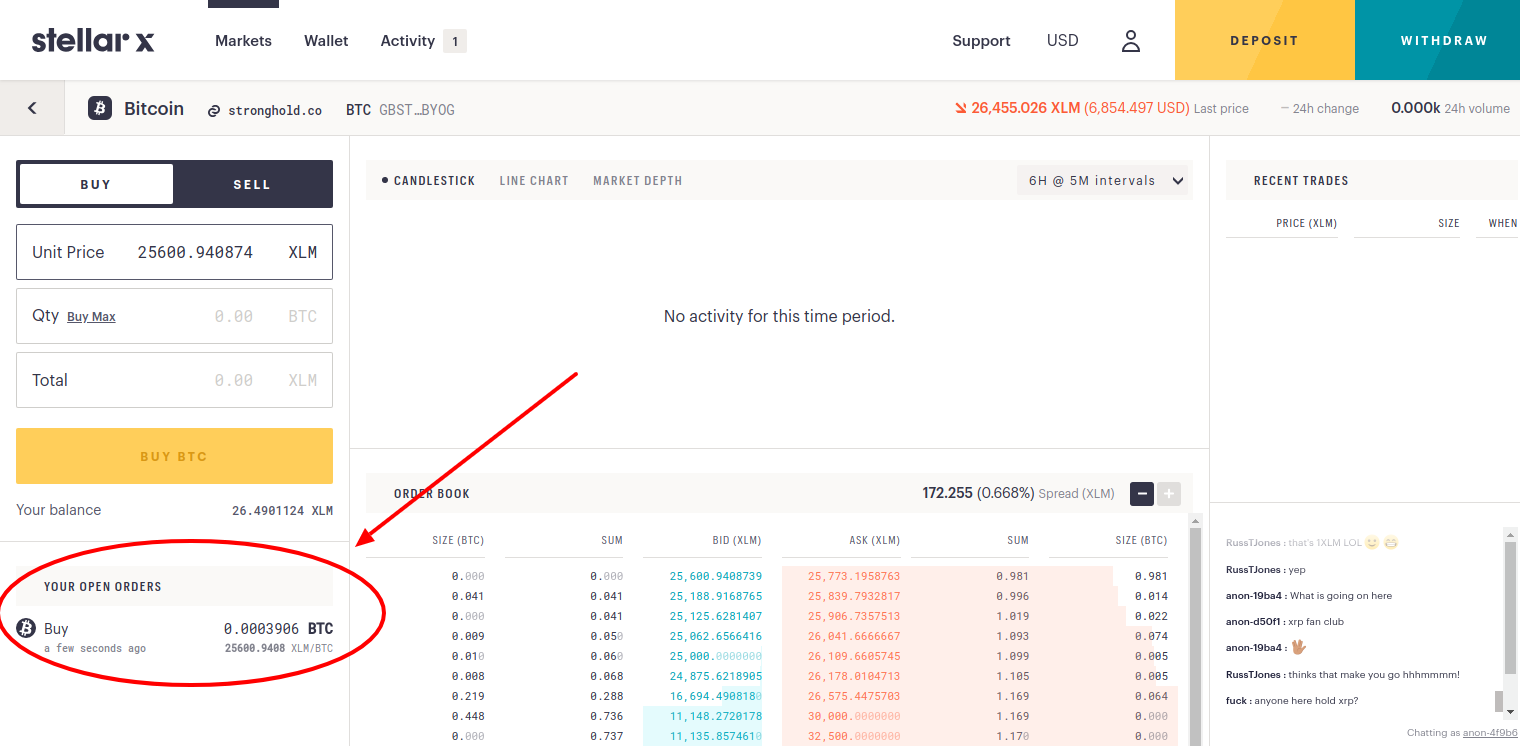
If you want to buy instantly, make sure that there is a sell offer at the price you are offering to pay. Otherwise your order will be logged and will wait for someone to come along willing to accept that price.
When you want to sell, the process is just the same, but in reverse. You can view all of your pending orders under the “Activity” tab.
Withdrawing Funds on StellarX
Again, withdrawal of XLM is very straightforward. If you are withdrawing to another exchange, you may need to include a memo, but StellarX will automatically detect major exchanges like Binance and will require a memo to complete the transaction.
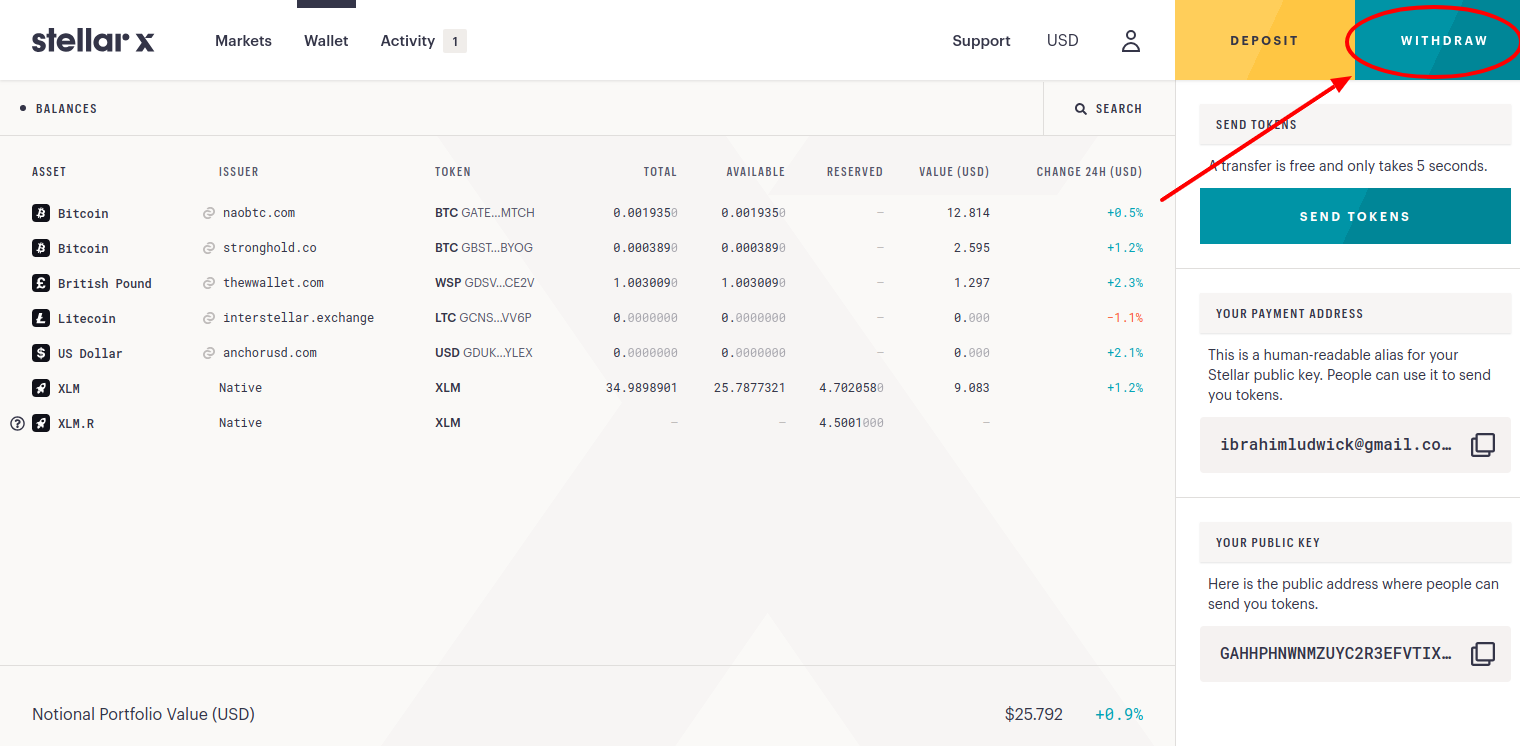
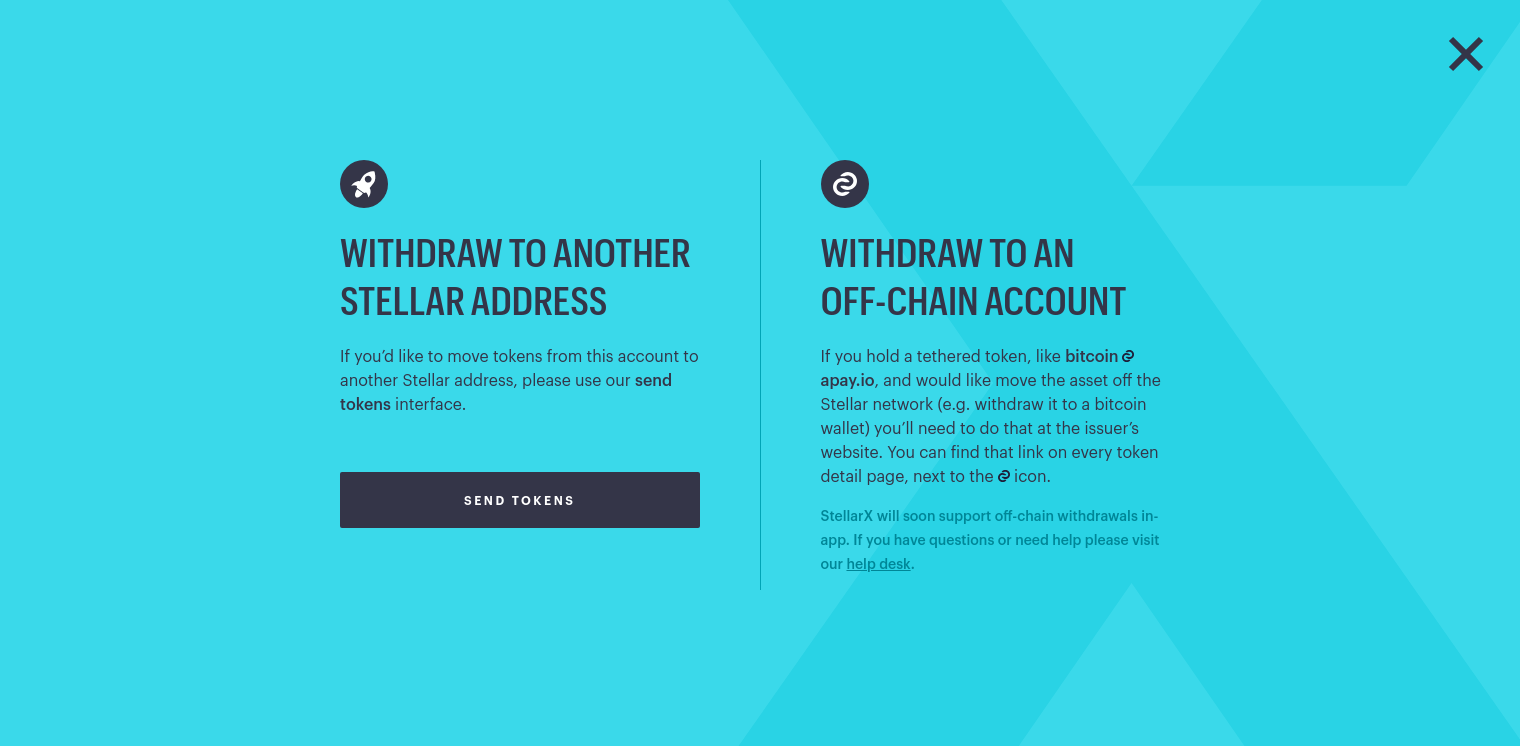
If you want to withdraw cryptocurrency or fiat, you will need to do so at the website of whoever the provider of the tethered token is. This process may be different on different websites.
If you already have an exchange account somewhere like Binance, it would be easier to just transfer tethered assets into XLM, and use whatever existing withdrawal corridor you have set up. Coinbase will likely be supporting XLM in the near future.
Conclusion
Well that’s it, you now know how to buy, sell and trade! As 50 Cent once said, “Get rich or die trying.” Or just invest in a balanced and moderate risk portfolio- whatever floats your boat.
StellarX has found a real sweet spot between functionality and decentralization. The design is already quite smooth, especially for a DEX, but you may notice StellarX is a bit slower than a centralized exchange. This is because all trades are actually recorded on the Stellar ledger.
Of course, you can always ask support if any issues come up, or just chat with people in the trollbox.
Volume is low on the exchange at the moment, which presents both challenges and opportunities for traders. Many more features are planned, so as volume increases, the overall trading experience should continue to improve.